We will configure the LAN Interface on our pfSense setup, but first we need to create an additional network using VMware’s “Virtual Network Editor”. The following steps will guide you into setting up a new virtual network.
Step 1.
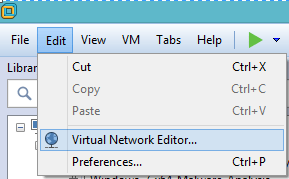
On your VMware Workstation application click on “Edit” then “Virtual Network Editor”.
Step 2.
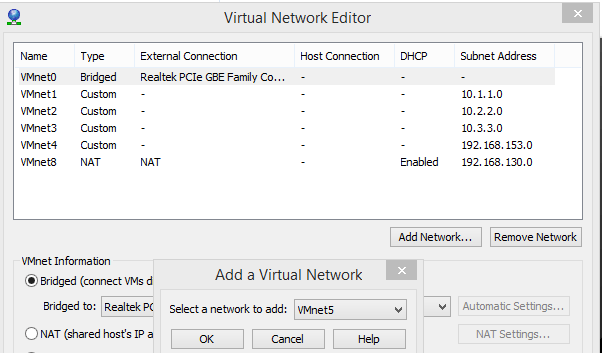
Select the option “Add Network” and by default it will add the next available “VMnet*” click on “OK”.
Step 3.
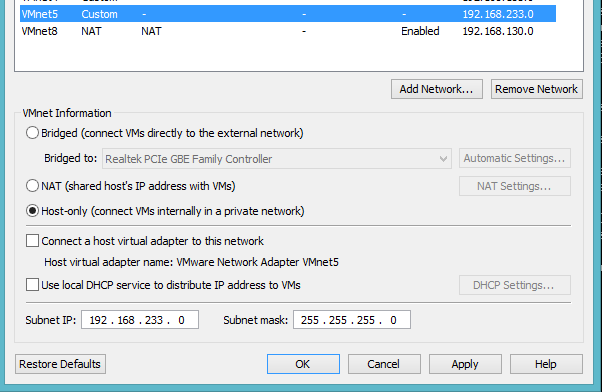
Uncheck the option “Connect a host virtual adapter to this network”, and the “Use Local DHCP service to distribute IP address to VMs”.
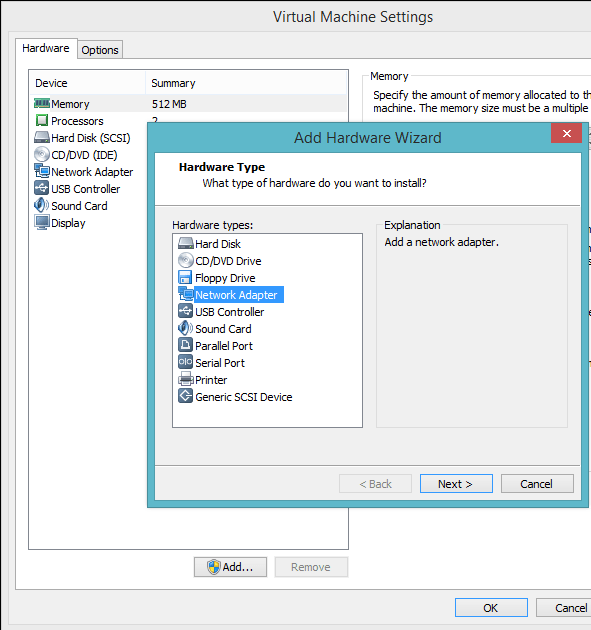
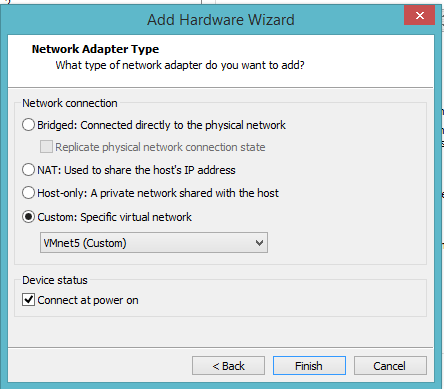
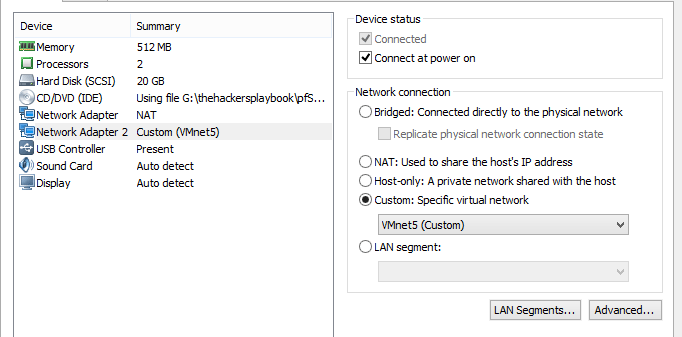
Step 4.
You can now add a new network interface on your pfSense virtual machine and assign this virtual network, in my example VMnet5, to the LAN Interface on your pSense VM. Select “VM” from the menu, “Settings”, then “Add”, then “Network Adapter”, then click “next”, then select the network type, here you select the new virtual network you created in Step 3, and select finish.
Step 5.
If you have your pfSense up when you made the changes you can simply reboot so that the new interface is present, select option 5 “Reboot system”, and “y” to confirm the reboot. You can select option 2, after the reboot to set an IP Address to the LAN interface.
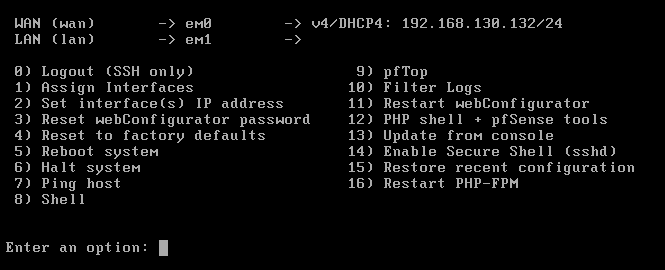
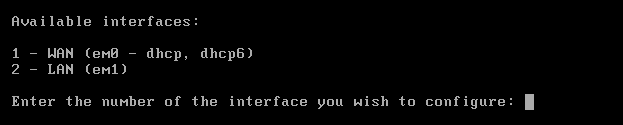
Step 6.
Once you have selected option 2, to assign an IP address, enter the number for the interface you need to assign an IP address. Option 2, for the LAN Interface.
Step 7.
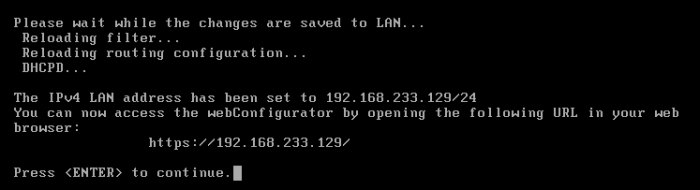
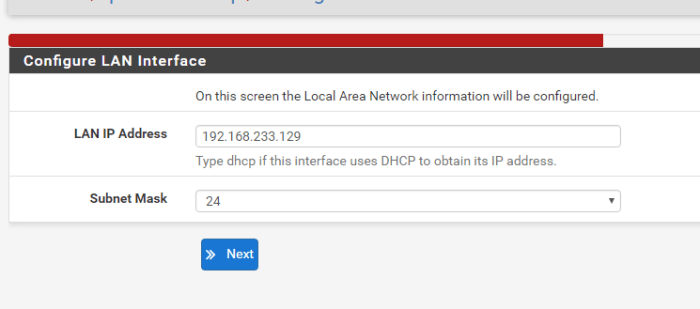
In Step 3 you can see a subnet IP: 192.168.233.0, and subnet mask: 255.255.255.0. You can select any IP address, for example 192.168.233.2, or .3, etc. etc. Below I selected, 192.168.233.129 as my LAN IPv4 Address.
IP Address:

Subnet Mask:

For a WAN, enter the new LAN IPv4 upstream gateway address.
For a LAN, press <Enter> for none: VERY IMPORTANT – Press enter for none.
Enter the new LAN IPv6 address. You can just hit enter for ‘none’:

Do you want to enable the DHCP Server on LAN? Y for Yes.

Enter the start & end address for the IPv4 client address range:

Do you want to revert to HTTP as the webConfigurator protocol? I selected no, and hit enter.

You can hit enter to continue.
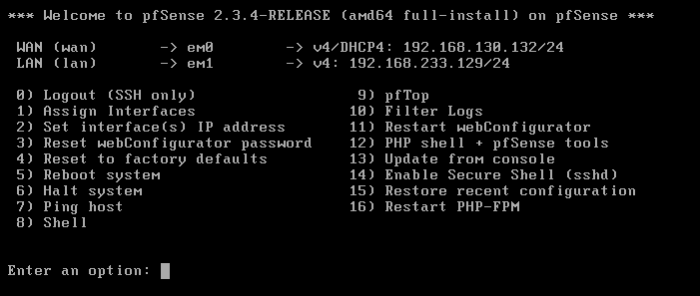
Your final, configuration should look like this.
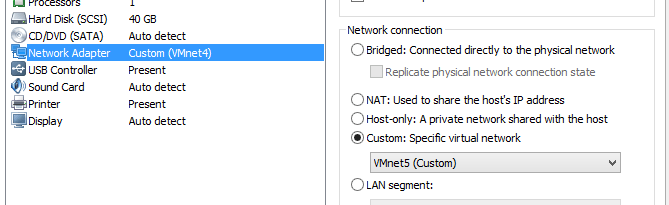
Step 8.
Configure your VM Desktop in my example a Windows 7 system, with the VMnet5 network. Select “Edit virtual machine settings”, “Network Adapter”, “Custom specific virtual network” – Vmnet5 (Custom).
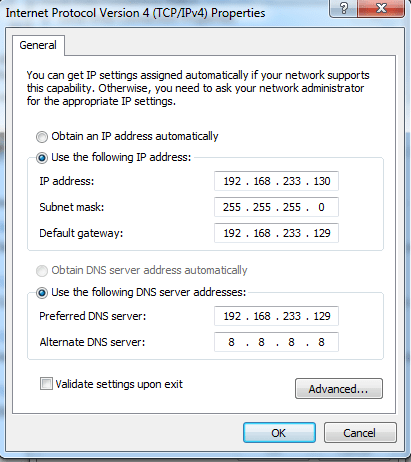
Step 9.
You can now boot up your Windows virtual machine. On your Windows virtual machine you will assign a static IP address, with the gateway and DNS IP address of the pfSense LAN IP Address. Example below.
Step 10.
You should have internet access, try going to google.com or any other site you want to test. Once you have finished testing, you need to configure pfSense admin portal. Username: admin, Password: pfsense
Click Next.
Click Next.
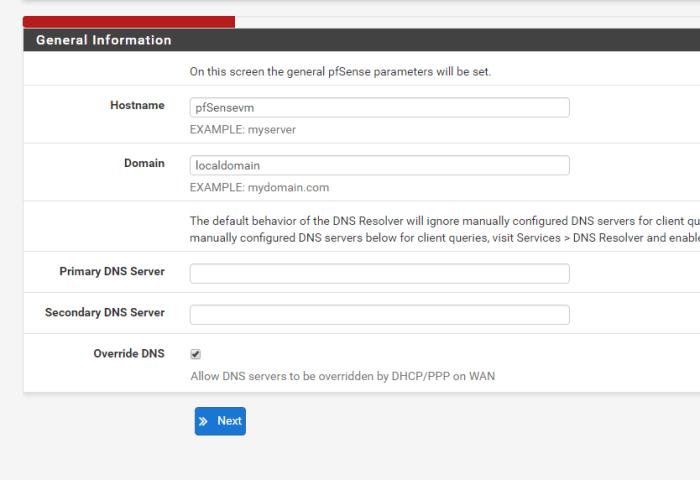
You can enter a different host name or DNS servers, I left it at default.
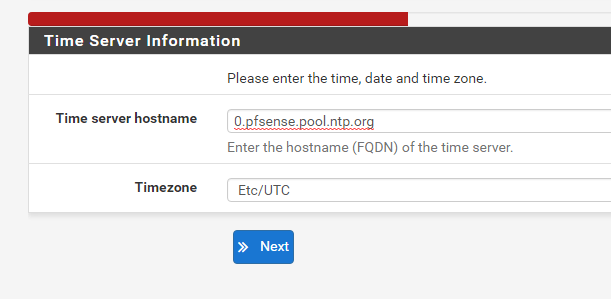
Select your time zone.
Scroll down and click Next.
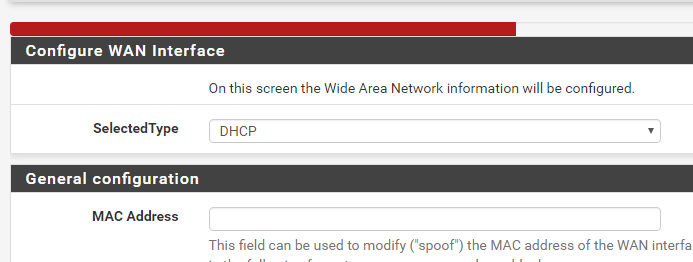
Click Next.
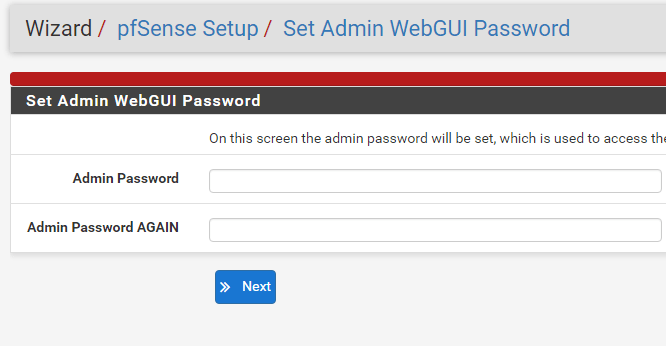
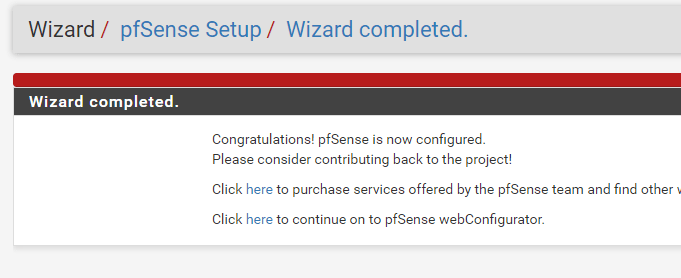
Change your pfsense admin account password, click next let it reload and click ‘here’ to continue on to pfSense webConfigurator.
Step 11.
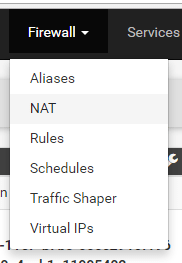
Login back into the pfSense Web portal and go to “firewall”, “Rules”, “LAN”.
Step 12.
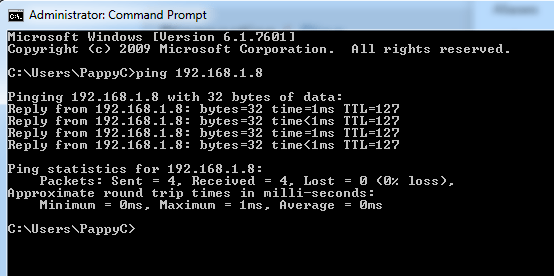
Before adding a rule to block access to my physical network, let’s confirm I can ping one of the physical home computers. Confirmation that one of my physical home computers is pingable.
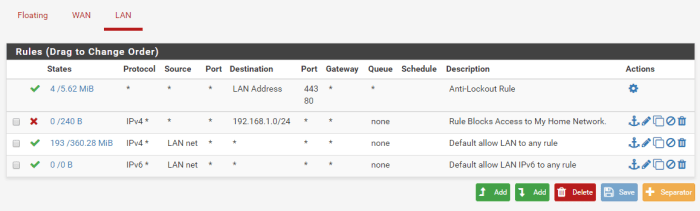
Step 13.
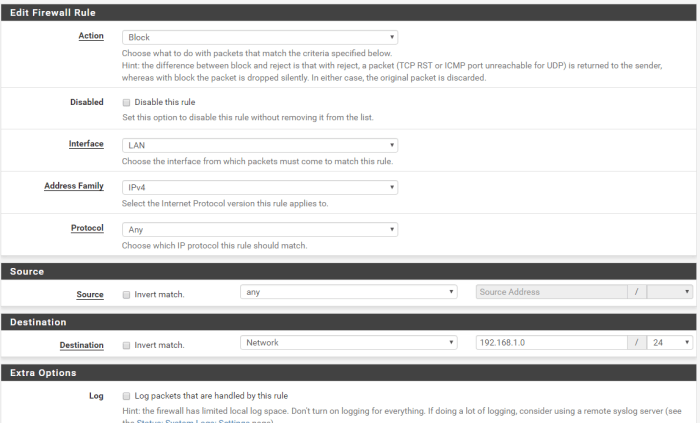
Let’s implement a firewall rule on the LAN to block access to the 192.168.10/24 network. Configure your rule similar to the information below, but with your IP information. Save the changes and then apply the settings.
Step 14.
Now when you try and ping your physical home machine it will be blocked because of the firewall rule configured in pfSense. You will still have internet access.